
How to Sew Felt (Easy Beginner Tutorial)

Felt is one of the easiest fabrics to sew, making it perfect for beginners and simple craft projects. Because felt does not fray, it is easy to cut, shape, and stitch by hand or machine. In this tutorial, you will learn how to sew felt step by step, including the best needles, thread, stitches, cutting techniques, and helpful tips for sewing felt successfully. Whether you are making felt ornaments, pincushions, toys, or decorations, felt is a versatile and beginner-friendly fabric to work with. Sewing felt has many unique qualities that make it versatile and decorative. Felt comes in many amazing colors and patterns, making it perfect for a wide variety of felt crafts.
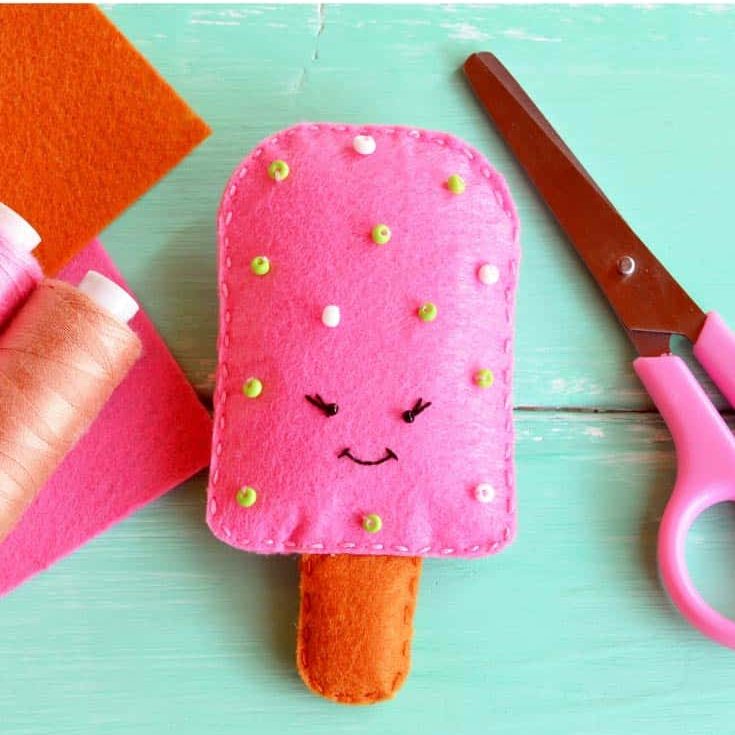

How Sew Felt (Quick Guide)
Follow these simple steps to sew felt successfully by hand or machine:
- Choose the right type of felt for your project
- Cut felt using sharp scissors or freezer paper templates
- Select suitable needles and thread
- Pin or clip felt pieces in place
- Choose hand stitching or machine sewing
- Sew using short straight stitches or decorative embroidery stitches
- Trim edges neatly and add decorative details if desired
What is Felt
Felt is a non-woven fabric with fibers made from wool or synthetic fibers such as acrylic that have been matted together. Sewing felt can be purchased in squares or on a roll by the yard. There are generally large selections of different colors and prints when purchasing squares of felt. Felt is a great fabric for beginners to use. Their bright colors and easy-to-sew textures are perfect for all sorts of little gifts.
Best Stitches for Sewing Felt
| Stitch | Best Use | Difficulty |
|---|---|---|
| Blanket Stitch | Edges and applique | Easy |
| Running Stitch | Decorative seams | Easy |
| Whip Stitch | Joining seams | Easy |
| Backstitch | Strong seams | Medium |
| Ladder Stitch | Invisible closures | Medium |
| Zigzag Stitch | Machine applique | Easy |
How to Sew Felt (Step by Step)
Learning how to sew felt is not difficult. Felt can be machine-stitched together or hand-embroidered. Here are a few tips and tricks for buying and cutting felt before sewing.
1. Choose Your Felt
When sewing felt, there are 2 main types of felt: craft felt and wool felt.
Acrylic craft felt is generally bought in pre-cut pieces of 9″ x 12″ (23cm x 30cm) from craft shops and is 100% acrylic or polyester. Occasionally, it can also be purchased on rolls at fabric shops. Acrylic felt can be a cheap option for items that won’t be washed, such as felt gift bags and pincushions. Purchase it in squares from your local haberdashery or craft supplies shop. Acrylic felt is great for projects such as felt flowers and pincushions, and kids’ craft projects.
The second type of sewing felt is wool felt, which can be 100% wool or, more commonly, blended with rayon. Where possible, choose the best quality felt made from wool, as it is generally easier to work with and softer than acrylic felt. Pure wool felt, of course, is more expensive than the blended variety.
Take note of the washing instructions for wool felt. Most should be hand-washed in cold water to prevent shrinking and pilling. Wool felt is great to use for doll and toy making, and ragdoll hair, as it lasts well and doesn’t pill as much.
2. How to Cut Felt
Cutting felt is easy too! Use a pair of sharp scissors to cut straight lines and small scissors for the curves. Felt is very forgiving as it does not fray.
The edges of your felt will not unravel or look ragged as you cut and trim. In fact, if you make a little mistake or have some extra offcuts just store them in a felt scrap box to use later. There will be an endless supply of shapes and sizes to add decorative trims to the items you make.
For smaller, hard-to-cut pieces, use freezer paper to get accurate cutting. Freezer paper is a kitchen product that can also be used for sewing and quilting. Freezer paper has a waxy surface on one side that can be ironed to your felt on a cool iron setting. You can then draw shapes on the freezer paper and cut through both layers.
For the below sample, I cut the freezer paper to my printer paper size and printed the shapes. Make sure you print on the unwaxed or matt side of the paper. After you have precisely cut your felt shape, gently peel off the freezer paper.

3. Sewing Felt By Hand
The most basic of embroidery stitches look great on felt. A simple running stitch, blanket stitch, and chain stitch with some buttons and sequins add to the most basic designs.
Here are the hand sewing tips for felt:
BEST NEEDLES FOR SEWING FELT – When sewing felt by hand, use a medium-weight hand sewing needle. If you are using a thicker embroidery floss you will need a thicker needle with a larger eye such as a crewel or embroidery needle.
BEST SEWING THREAD FOR FELT – Use either a strengthened polyester thread or embroidery floss for a decorative look. Embroidery floss comes in strands that are twisted together so you can separate the stands and vary the thickness. Thicker threads look great for a decorative look, especially when using contrasting colors.
THREADING: For hard to thread floss, use a needle threader to pass the thread through the eye of the needle.
STITCHES: Learn how to sew basic hand embroidery stitches such as
- Blanket stitch (Great for joining seam and applique)
- Whip stitch (Best stitch for joining seams)
- Running stitch (Use for applique)
- Backstitch (Use for applique)
- Ladder stitch (Best stitch for closing gaps with an invisible stitch)
- Chain stitch (Great stitch for applique)


4. Sewing Felt by Machine
Here are the machine sewing tips for felt:
NEEDLES: Medium-sized, sharp sewing machine needles are best as a thicker needle will make holes in the fabric. Universal sewing needles work well. (Read my guide to sewing needle sizes).
THREAD: Use a strong all-purpose polyester thread for sewing felt. Cheaper threads tend to break more easily so purchase a good quality like Rasant, Gutterman, or Coates.
MACHINE FOOT: For most projects, an all-purpose sewing foot can be used for sewing felt. Glitter felts and other felts with a textured surface may benefit from using a Teflon foot instead. A Teflon foot will glide over difficult fabrics that would otherwise stick to the bottom of a regular metal foot.
STITCH LENGTH: If you are sewing felt seams on a sewing machine, a short straight stitch around size 2.0 works well. When sewing applique, you can use a small zig-zag or 3 step zig-zag to seal the edges. The length of the zig-zag should be longer than you would use on woven fabrics as felt does not fray on the edges. Start testing with a width of 3.5 and a length of 2.0 and see if you like how it looks.
Felt Sewing Projects
Whenever you need a little handmade gift, get out the felt scrap box and rummage through all your bits and pieces to cut, make and trim little, felt sewing projects.
Ideas or sewing felt include
- Christmas decorations
- Bookmarks
- Pincushions
- Garlands
- Coasters
- Gift bags
- Puppets
Every sewer needs a felt pincushion! This free pincushion pattern with a sewing machine applique makes a perfect gift for any sewer. The patterns and ideas for sewing felt crafts are endless. You are sure to become a felt fanatic when you realize the wealth of sewing opportunities felt can bring to your sewing table. Now you know how to sew felt why not try some fun patterns!


How to Sew Felt Video Tutorial
Did you know that Treasurie has a YouTube channel featuring weekly sewing and craft videos? Here is a video I made of the felt gift bags. Don’t forget to subscribe to the Treasurie channel.
7 Main Types of Felt for Sewing
Most types are categorized by what they are made from and how they are created.
1. Wool – This type of felt is made by layering the natural fibers of wool. Soap, heat, and friction are needed for the scales of fibers to interlock and be entangled. The result of this process is a soft and desirable fabric. It can be shaped, and because of the layered fibers, it is thicker than many other types. Wool felt does not pill, unlike other types.
2. Acrylic – Acrylic felt is very cheap and easily available and is often sold in pre-cut squares. One of its benefits is that it does not shrink after you wash it. However, the downside of acrylic is that it is not as supple and durable as wool. This fabric is not environmentally friendly because it is made of plastic. Acrylic is not as long-lasting as other forms, but despite its downside, it is extremely popular due to its considerably lower price.
3. Fur Felt – Fur is an impressive type due to its malleability and durability. It can be made into hats and other accessories. Unfortunately, it uses animal fur, which involves animal killing, so it is not the best choice for most people.
4. Rayon – Rayon or viscose felt is usually used in industrial and medical applications. It has many of the same properties as wool. One of the good properties of this type is that it can be shaped into various insulative products, but just like all synthetic fibers, it is a non-biodegradable pollutant.
5. Pressed – Pressed felt is the oldest type according to human history. It predates weaving and knitting techniques and is the most common type using pure wool or a blend of synthetic and wool fibers.
6. Needled – Needled felt can be produced by combining synthetic and wool fibers or just purely wool fibers. This type uses machines that have thousands of needles to produce a less dense type and a softer fabric. It is usually used for crafts and cushioning.
7. Woven – Woven felt can be made of wool or a wool blend that is woven into a cloth. This weaving process usually makes the fibers naturally entangled or interlocked. This fabric is ideal for door seals and musical instruments. Unlike needled and pressed versions, it is able to be produced in thinner sheets.
Sewing Felt FAQs
Since felt doesn’t fray on the edges, it doesn’t need to be hemmed or finished. This makes sewing felt much quicker and easier than sewing many other fabrics. If you do wish to hem felt, use a machine straight stitch or a small running stitch by hand.
When sewing felt, I don’t advise that you wash it first. Most felt projects are not designed to be washed, so there is no need to prewash your fabric. Decorations, pincushions, and felt toys don’t need to be washed ever. If you do have a felt item that will need to be washed regularly, then you should certainly prewash it. Check the care instructions for the felt. Generally, you would do a cold hand wash and dry flat in the shade.
No felt doesn’t fray when cut. This is one of the many reasons sewing felt is so popular. There is much less work involved in finishing edges. If you do wish to finish the edge of the felt, consider a hand stitch-like blanket stitch that covers and protects the edges.
While sewing felt is a long-lasting and strong option, there are occasions when it is faster and better to glue felt. If your felt item will not need to be washed, it can be glued together instead. Use a craft or fabric glue that dries clear for best results. Appliqué felt is ideal for using glue instead of sewing, while felt seams are better to be sewn.
Felt has no right or wrong side. It has no direction in the pile and can be cut and sewn on either side. The exception to this is some felt with a printed pattern or glitter on one side. These are normally craft squares that are stiffer and not suitable for all felt projects.
Most felt can be ironed. Check the composition of your felt and change your iron settings accordingly. Wool and acrylic felt will need a low iron temperature and a pressing cloth between the iron plate and the felt. This will protect the felt from melting or marking. Hanging the felt overnight or placing it in your steamy bathroom while you shower may stop you from needing to iron larger pieces of felt.
Pin for Later

How to Sew Felt – In Conclusion
Learning how to sew felt is a great starting point for beginner sewing and craft projects. Since felt is easy to cut, doesn’t fray, and works well with both hand sewing and machine stitching, it is one of the most versatile fabrics for creative projects. With the right needles, thread, and simple stitches, you can create everything from ornaments and toys to pincushions and decorations.

Author - Luisa Clare
Luisa Clare is the founder of Treasurie, a sewing and crochet education platform offering step-by-step tutorials and printable patterns. With over 15 years of experience in dressmaking, pattern design, crochet, and craft education, she specialises in teaching beginners through clear, easy-to-follow lessons. Her tutorials and patterns are used by home sewists and crocheters worldwide to build practical skills and confidence. Learn more about Luisa and Treasurie.


Felt is surprisingly easy to sew as needles go through really easily. If you are hand sewing, a sharp fine to medium weight needle. For machine sewing, a universal needle matching the felt weight. Don’t choose one too thick or it can leave holes.
What needle is used to sew felt ?
Hi Jackie, Use a bit thicker thread. Or a strengthened thread (polyester with a strengthened core.) Use the smallest length stitches you can. And at the start and finish, stitch in the same spot a couple of times to stop it coming undone. Good luck with it. It sounds a very ambitious project.
Do you have any tips for back stitched seams? I’m making a felt coat, but my seams pull open when turned right side out. 🙁 Tighter stitches, or a different stitch maybe? I’m using regular cotton thread, so am afraid of it tearing the felt if I stitch too tightly…
Hi Tanya, use a polyester thread from a quality brand. I like Rasant as it is reinforced and doesn’t snap easily.
Hi. What thread can I use on my SM when seeing to die cut felt shapes together?